Monday, February 28, 2011
Rub-a-dub-dub
Happy Birthday to my littlest guy! I can't believe my baby boy is one year old!
Of course I had to make my son a super-cute cake for his first birthday, so after much thought and searching online for a fun cake, I settled on a bathtub. Random, I know! I happen to know from experience that the only birthday cake I get to choose is the first one. All subsequent birthday cakes get to be chosen by the birthday boy since by the age of two they've got all sorts of ideas and opinions as to how a cake should look. At least my eldest son does! He's got his next two birthday cakes planned already!
I was asked several times at the party how long it took me to make this cake. I would guess somewhere between 10 and 15 hours with all the planning, baking and decorating. I haven't done many carved cakes. Only one, actually, so this cake took a major amount of planning on my part so I would have the confidence to carve a perfect (or near perfect) shape.
The carving went really well. Much better than I had expected it to go. I had a few issues while covering the cake with fondant, but in the end realized that there is a better and easier way to cover cakes than I had learned in my class. We'll see if it really is easier the next time I do a cake! After I finished carving I also realized how easy this cake could turn into a Noah's Ark! I'll have to keep that one in mind for a future birthday just in case one of the boys needs help deciding on a cake!
The bathtub on it's own was pretty cute, but for me what really makes it is the flooring. I love how the checkerboard floor turned out. After the flooring was in place I got more and more excited with each additional detail . The day before the party I spent the evening making the taps and faucet, ducks and a little cartoon figure of my baby. Just before the party I put all the elements together, adding the wires with splashes on the ends. Those splashes put the cake over the top!
This was also my first time using gum paste (the faucet was made from gum paste). For some reason I have been intimidated to work with gum past up until now. I'm looking forward to doing some more experimenting with it in the future.
So even though my son was oblivious to what was going on, we had a blast watching him enjoy his first taste of cake! Looking forward to many, many more birthdays and cakes in the future. I love making these cakes for my kids!
Oh, and just in case you were unsure if this was really cake, here's a picture of the cake after we took out the first slice for the Birthday Boy! It was a lot of fun to have the pleasure of cutting the cake and seeing everyone enjoy it! This particular cake was four layers of rich homemade chocolate cake with Swiss Meringue Buttercream frosting. I have to say...it was tasty!
Monday, February 14, 2011
Snowy Wedding
I had the privilege of making a cake for my cousin's wedding last month! This was my first wedding cake and I was given quite a bit of creative license, which was awesome and scary all at the same time. She just wanted a small cutting cake since they were already having a served dessert. So this was an 8" bottom tier with a 4" top.
After we decided that the theme of the cake would be "snowflakes", I started to think about how to make snowflakes that look real...not just like cut-outs. I started searching online, and came across these incredibly detailed snowflake moulds that could be used with fondant. Each fondant snowflake was pressed into individual moulds and frozen in order to maintain the incredible detail of the delicate flakes. Then the snowflakes were dried so they could be painted silver before being adhered to the cake. The cake was finished with silver balls and dark purple ribbon (silver, white and dark purple were her wedding colors...beautiful combination). Everything went fairly well, except for a few fondant challenges, but nothing that couldn't be overcome with a little extra work.
Since the cake couldn't be stacked before delivery I couldn't get any great pictures. My camera is just a little point-and-shoot and the dim lighting of the reception hall made for some terrible pictures (sure made for an incredible ambiance, though). Ends up that I was lucky enough to meet the talented Becky Radtke, who was photographing the wedding with b2 Photography. She graciously agreed to send me some pictures of the cake! I'm so thrilled with these pictures! Just so happens she's also launching a new Photography business, Jack and Ruby Photography. Check out her websites! Thanks so much, Becky!
You'll also notice some of the pictures have cupcakes. My sister and I make yummy homemade cupcakes and cookies with our little label, Barely Burnt Cookies and More! My sister made mini cupcakes topped with shimmery white chocolate snowflakes. Check out our blog here!
All in all, this was a great experience. And creatively speaking, I feel like I've found a bit of a groove. I'm learning so much with each cake, and am thankful for each opportunity to do so!
Friday, February 11, 2011
Cute Little Birthday Cake
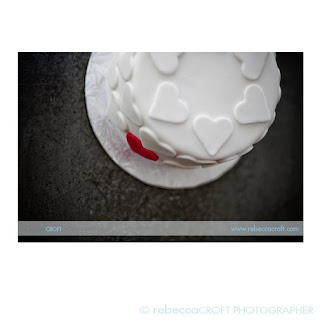
I made this cute little 6" heart cake for my wonderful friend, Becky, for her birthday. She was so thrilled that she declared that she must go home and photograph it before anyone ate it! This is the same talented Photographer friend that has photographed one of my cakes before...take a look at her website here. The photos you see here are all hers! Thanks, Becky, for allowing me to use your beautiful pictures!
This was the most stress-free cake experience that I've had to date! This was such a fun cake to make!
Subscribe to:
Posts (Atom)